As I’ve mentioned, the inspiration for these chairs came, in part, from a photo I found online. This helped get me started with some of the basic shapes such as the curved arms. I was able to play around with the shape of the arms until I came up with something that I liked. Figuring out the shape for the seat and back pieces, however, was a little different process. Recall that the rear leg and rear support pieces are cut with a 15 degree angle on the inside edge.
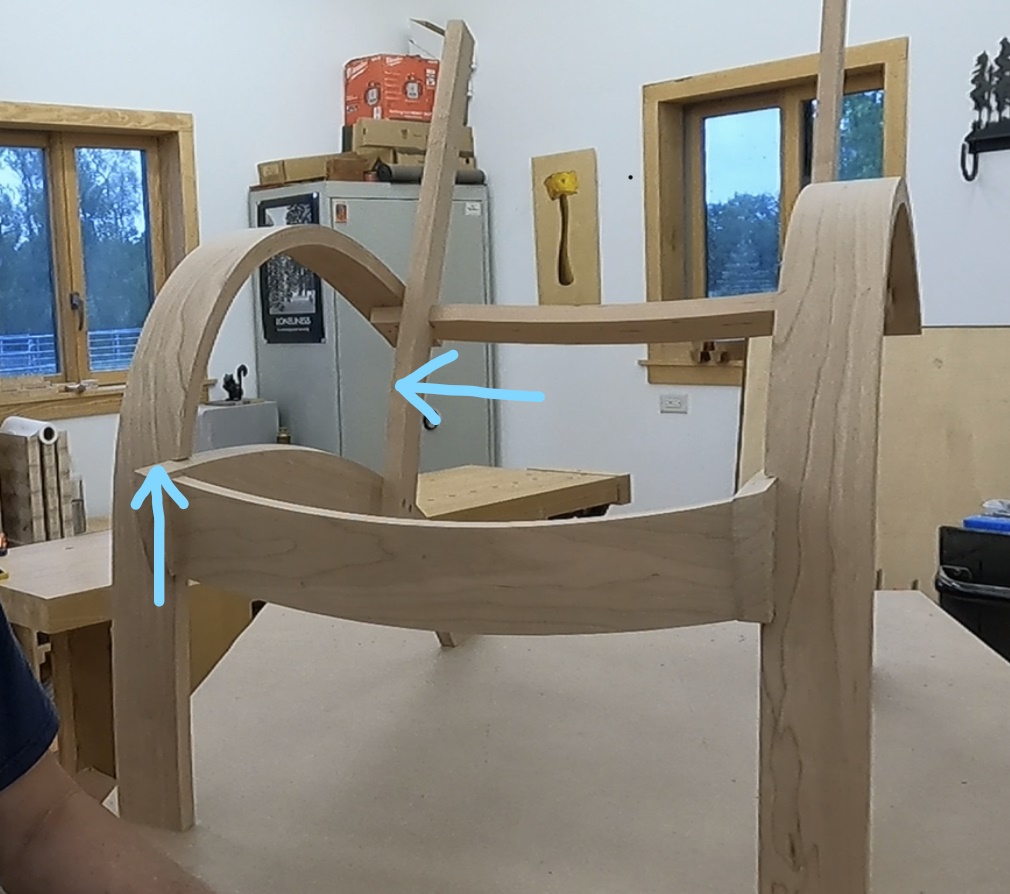
So, for the seat and back pieces to fit properly they need to be shaped to match these angles. While I could probably have figured out this shape through trial and error, there was an easier solution.
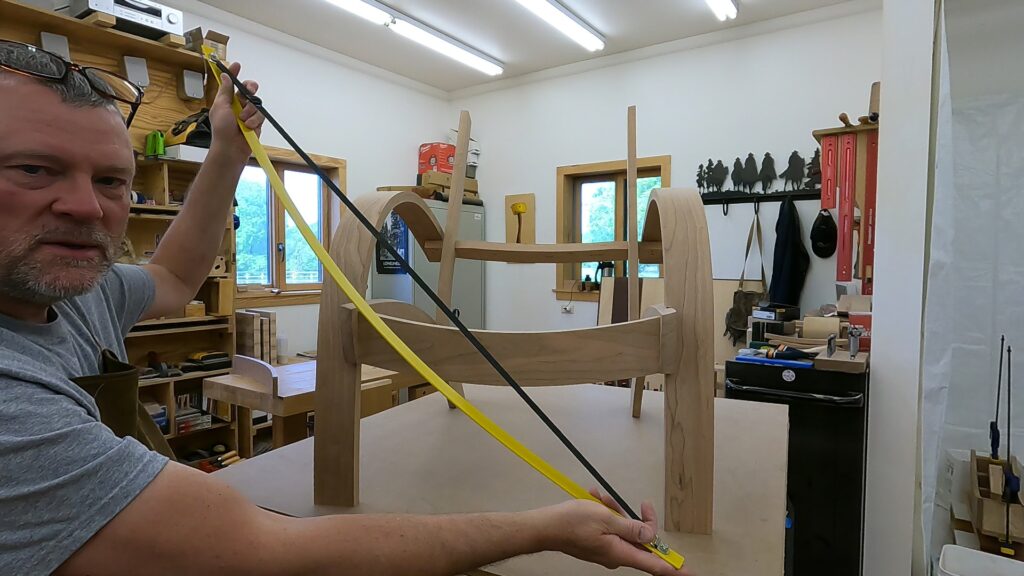
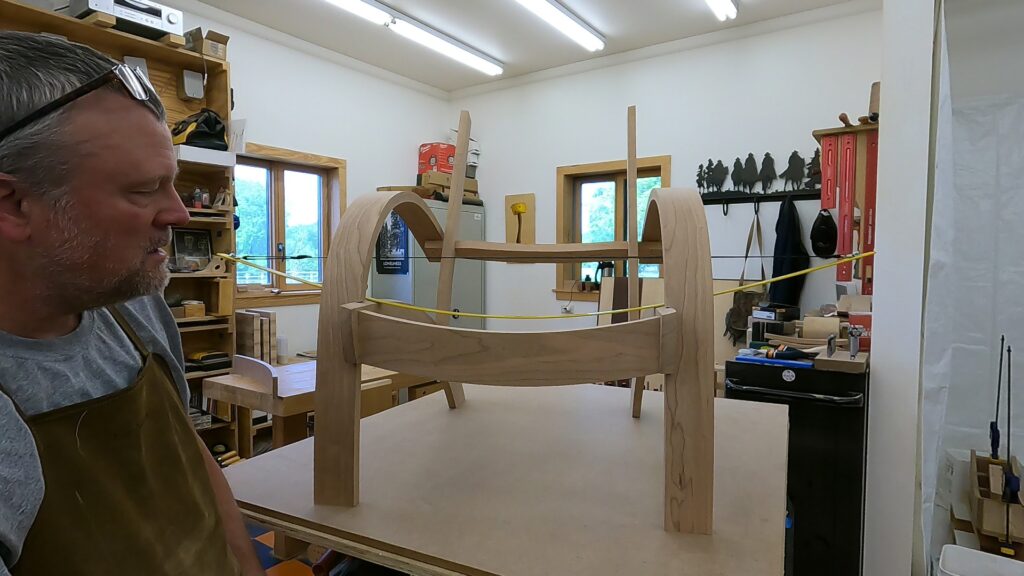
This is a drawing bow which is a fancy name for a piece of fiberglass with an adjustable strap. I adjusted the bow to create a curve which exactly fit the curve of the chair frame. Then I used the drawing bow as a template to make the bending form.
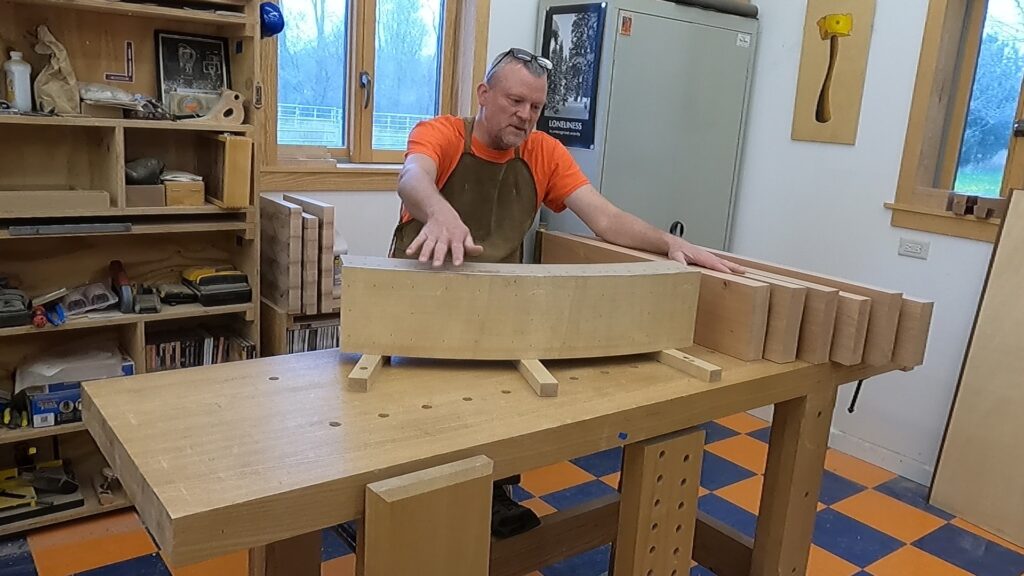
I made these pieces the same way I made the curved arm pieces. I glued several thin strips of wood together, shaped them around a bending form, and clamped them in place. The only difference is that the seat and back pieces use fewer wood strips (5 vs 8) and obviously use a differently shaped bending form.
In the next installment, we’ll look at how the seat and back pieces were shaped and installed.